Adding or Modifying Material
Once you have your own copy of the “design” repository, it’s time to add your contribution to it. This can be done in one of two ways:
- Modifying existing material or
- Adding new material
Modifying Existing Material
If you are modifying existing material, navigate to the appropriate folder (courses, units, or topics) to find the file you want to edit. Note that the files are written in Markdown. For information on relevant Markdown syntax used in this site, see section on Markdown Syntax.
Adding New Material
BEFORE ADDING NEW MATERIAL: Navigate to Site Map and scroll through all the courses, units, and topics to see what is already up on the site. If you find anything related to the content you wish to contribute, please look at what’s there first. This is to minimize redundancy. If appropriate, you may always add to material that is up on the site.
If you are adding new material to the site, there are some things you should consider:
- How does your material interface with our format (the “hierarchy” of content established on this site)?
- How will you organize your material using this hierarchy?
- How will you present your material given the tools available in markdown?
Once you’ve considered these questions, it’s time to start adding your own material.
1. Save Templates
In your local copy of the repository, navigate to design/templates/ and find the appropriate templates for your new material.

Open the template file for the type of content you wish to upload and IMMEDIATELY SAVE AS, choosing a clear name that describes the content in the file (usualy the title you will use). Make sure that the name isn’t already used elsewhere (including in another category). If you wish to use more than one word, represent spaces with a dash: this-is-an-example.md
2. Fill in Header
At the top of each template, you’ll need to fill in the header with the appropriate:
- Title
- Abstract
- Reference ID (The name of the markdown file you are edditing: this-is-an-example)
- tags (key words by which the file can be searched for)
- skills (what does the user get from the file? similar to tags)
- Units (if “course”) or Topics (if “unit”) - same format as reference ID: give the redererence IDs of the files you are citing
- previous (for topics only) - what previous skills should the user cover?
3. Add your Material
Once you have the header set up, go ahead and fill in the template with your material! For any questions regarding syntax, refer to the “Markdown Syntax” section.
Under Construction
Once you begin editing or adding new material, you will notice a section of the header dedicated to an “under construction” banner:
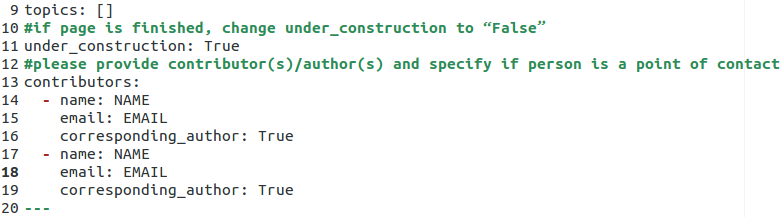
The default of the under_coustruction: setting is set to “True” (all pages start out as “under construction”). However, once you decide that a page is finished, you may change the value of under_construction: to “False” (line 11 in the image above).
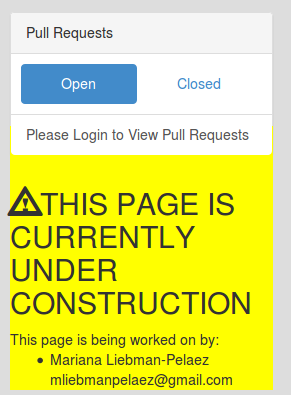
If the page is still under construction and you wish to leave the banner, you may also speciy the author(s)’s name(s) and email(s). The banner will appear in the sidebar like so:
Comments Section
All pages come with a comments section at the foot of the page. This is to promote feedback and collaboration on educational material. The greater the conversation, the better!
Comments loading please wait.
Unfortunately if this is an https site comments will not load. Please change to use http for comments to load. in the future we plan to support https comments too.